Are You Ready for Some Football Food?

Around my house this time of year, Sunday afternoon is football time. Nothing else goes on the t.v. except a football game. One of my favorite ways to watch a football game is by stuffing my face with delicious food. Am I right? I’m a Redskins fan, so sometimes all I have is the food…

Anyway, here are five easy recipes I found from the world of Pinterest for you to enjoy!

five football sunday receipes Collage

First up, Buffalo Chicken Dip. Let’s be honest, who doesn’t love a good dip while they are watching the game? Bombshellbling.com brings you this awesome dip that’s easy to whip up.

Buffalo Chicken Dip

If you like that dip, why not try some buffalo chicken drumsticks too? Thefrugalgirls.com bring you this delicious looking dish, and it only has 3 ingredients!

Buffalo Ranch Drumsticks

Next, how about some wings? I’ve got two recipes that bring you a healthier baked option for your wings. You are trying to eat healthy while watching football right? Ok, maybe not all the time, but these are too easy not to try!

This one is brought to you by damndelicious.net

untitledAnd this one comes from 100daysofrealfood.com

Oven Baked Chicken Wings

The last recipe is for those who like it spicy! Honey Sriracha Chicken by therecipecritic.com, do I need to say more?

Honey Sriracha Chicken

Give one of these recipes a try this weekend, and don’t forget to follow me on Pinterest for more delicious food ideas (I have a whole board dedicated to food!) and other fun things like holidays, sewing, and Disney!

Saving a Little Summer for the Winter Time

I’m going to say it and make it official…summer is coming to an end! Yup, whether you like it or not, fall is right around the corner. I like the fall. It’s one of my favorite times of the year. What’s not to love? You’ve got Halloween, the county fair, pumpkins, cider, apple pie, pumpkins, hay rides, pumpkins…did I mention I like pumpkins?

To get ready for all the cooler weather we’ll be getting in the next few months, my mom and I got together for our annual canning day. It’s the time when we take the sweetest tomatoes we can find and make them into my grandmother’s awesome spaghetti sauce. It is literally mouth watering when you smell the aroma of spices mixed with fresh garden tomatoes.

Look at these beauties!

DSC_0779

And these peppers! Don’t they look tasty?

DSC_0776

Of course you have to add onion too; so festive!

DSC_0778 DSC_0777

After scalding the tomatoes, we cut them into small pieces and saved as much delicious tomato juice as we could.

DSC_0782

There’s my mom. Hi Mom! You can tell she really wanted me to take this picture. We have fun together though, me and my mom. I like canning with her because it gives us a connection to all the great ladies in our family who came before us. My grandmother canned, so did her mom, and so on…Plus it’s great to have some girl time every now and then.

DSC_0781

Once all the tomatoes are sliced and diced, they go in the pot along with the peppers and onions. I can’t tell you any more than that, as this is a secret family recipe. We’re kind of like the Bush’s Baked Beans guys except not that famous and we don’t have a talking dog.

Here’s a look at the tomatoes and other ingredients in all their glory. Mmmm…sauce…

DSC_0784

Once the sauce has cooked and tastes just right, it’s time to go in the can where it will live until it’s very cold and I have a hankering for a taste of summer. Looks good, doesn’t it?

DSC_0785 DSC_0787

Ta da! A nice jar of spaghetti sauce. I think we canned about 15 jars or so that day. A little side note though, my mom and step-dad are both big on canning. A few weeks before this they canned a couple dozen quarts of pickled beets (I say eww, others say yum on that one), and a couple dozen jars of corn relish.

DSC_0790

For me, this spaghetti sauce is more than just a little bit of summer in the winter time, it also brings back fond memories of my grandmother and how good her house would smell when she was making us her famous spaghetti dinners. When my mom was a little girl and would complain about canning, my grandmother would tell her, “You’ll be happy when the snow flies.” And you know what? I think she’s right.

Disney Movie Nights: The Lion King

Lion King Movie Night

One of my all time favorite Disney movies is the Lion King. I still get goose bumps whenever I hear the opening song and watch the animals come to meet the new baby Simba. Naturally one of our Disney Movie Nights involved showing the Lion King and transforming our house into the Pride Lands.

DSC_0621

I had a lot of fun decorating for this movie night, using streamers, card stock, and images from the Lion King made it feel like we were part of the movie too.

DSC_0622

Blue streamers taped to the ceiling created the water fall. You gotta love streamers!

DSC_0624

The leaves on the jungle vines were made out of cardstock. Simply print a leaf template, trace it, cut it, and bam! You have a leaf. I cut the vines from brown ribbon; I chose a thin ribbon but you could use a thicker type of ribbon too. I also taped the leaves to the vines because I’m seriously lacking a hot glue gun, but they stayed on just fine.

DSC_0627

I cut the grass of the Pridelands  out of cardstock and taped them to our coffee table. In order for Simba and Nala to stand up, I had to tape them to the grass and put something heavy behind the cut outs so they wouldn’t fall down. I like how they’re peaking out from behind the grass; it reminds me of the scene when they are trying to sneak away from Zazu and start singing I Just Can’t Wait to be King. 

DSC_0623

The menu was slimy, yet satisfying. Ok, maybe not so slimy, but definitely satisfying!

DSC_0628

DSC_0630

We needed all of the grub too, because a whole herd of animals came to party with us.

DSC_0632

To help the kids show off their wild side (as if they need any help in that department) I bought some animal masks like these for everyone to wear. At this point we were only two weeks away from our vacation and the Disney vibes were strong. We had a wild time watching this classic with our friends!  

hakuna_matata-495

Disney Movie Nights: Toy Story

When you first saw Toy Story, didn’t you think it would be really fun if your toys came to life just like Andy’s? I know I did! There was and still is something magical about that movie. I guess that’s why it’s my favorite Pixar creation.

Naturally, it was on the list of movies to watch for our Disney Movie Nights. As always, we had a sign at the entrance to our kitchen welcoming everyone to our theater.

Toy story movie night

This was a really fun one to decorate for. I tried to re-create Andy’s room by using some of the things we had around the house, including my son’s toddler bed. It made the perfect spot to watch the movie.

DSC_0581 DSC_0580

I printed out pictures of our favorite characters from the movie and hung them around the room to make it look like we were watching the movie in “Andy’s Room”.

DSC_0578 DSC_0579

Of course, you can’t really be in Andy’s Room unless there is a sign like the one he has on his door:

DSC_0575

Some of my son’s toys even came down for the show!

DSC_0584 DSC_0585It was easy to figure out the menu on this one, Pizza Planet anyone?

DSC_0594 DSC_0600The space goo was fun to make too. Make your favorite Jello flavors, put some silver space looking sprinkles on top, and now you’ve got a favorite alien treat! 

DSC_0598

The little green army men were hungry too, and dropped by for a snack.

DSC_0588

Bringing Andy’s room to life was fun and made the movie even more enjoyable. Movie nights don’t have to be complicated, just do enough to make it magical for the kids (and yourself too).

DSC_0593

How Does your Garden Grow?

Hey there!

It’s that time of the year, isn’t it? When you go out to your garden to see what yummy vegetables are ready to be picked. With this being our first year, my husband and I weren’t sure what to expect. Our first round of pickin’ produced delicious kale, peas, and romaine lettuce.

wpid-20150522_200341.jpg

It was a small amount, but it tasted great anyway. The next round of pickin’ will be even better because of this guy:

DSC_0215 DSC_0219

 This is a Big Boy tomato plant, and boy is it BIG! So far I’ve counted at least twenty tomatoes growing. Before the tomatoes came it was standing up right and taller than me (I’m 5’2), and now it’s laying down spilling into our neighbors yard.

I’m licking my lips waiting for these babies to turn red; there’s nothing better than a fresh tomato out of the garden. Am I right?

DSC_0218

My youngest son calls this one Bob the Tomato from Veggie Tales. It was the first one we saw growing…hopefully it will be the first one we eat!

DSC_0216

We also have broccoli that finally decided to grow along with cherry tomatoes, peppers, and watermelon that are looking good.

DSC_0213 DSC_0220 DSC_0214 DSC_0212

I’ve given up on the squash, even though the plant looks great, the vegetables only grow a certain size and then fall off. Our cucumbers are tiny, but maybe they will make it. Next year we will try a different spot for the squash and see what happens.

DSC_0221 DSC_0222

So, how is your garden growing?

Skylander Birthday Party Ideas

Do you have a kid who is a fan of Skylanders? Do they wake up in the middle of the night and start playing with them? Ok, maybe that’s just my boys… If you’ve been trying to figure out how to give your son or daughter a skylander birthday party, here are some tips to help you out.

Skylander birthday party sign

When I asked my youngest son what theme he would like for his upcoming 3rd birthday, I wasn’t surprised that his answer was Skylanders. He LOVES them. Wait, scratch that, he is OBSESSED with them.

As with all of my kid’s parties, I used store bought and DIY decorations. As I said in a previous post, I love to use the store bought decorations to compliment the ones I make. For this party, I thought it would be fun to make the goody bags instead of purchasing them.

To make them you will need:

  • Plain paper bags (mine came from the dollar store)
  • Skylander Character print outs
  • Glue stick

DSC_0824

I google searched images of the skylanders, one character from each element (Earth, Fire, Water, Magic, Life, Undead, Tech, and Air), and printed them out. I then took the glue stick and glued one of the skylander pictures onto each bag. 

Here’s the finished product:

DSC_0825

I also made a banner made of the element symbols.

To make these you will need:

  • Cardstock (multiple colors)
  • print out of each element
  • glue stick
  • ribbon/rope

Cut each piece of card stock the same size as your element print out. Glue your element print out to the cardstock (I was able to modify my element print out and make it the size I wanted by using the site picmonkey.com), and punch a hole in each side of the circle. Weave the ribbon or string through the holes, and you’ve got yourself a festive banner!

DSC_0889 I had to tape this one onto the garage, the second one I made hung from the trees over our “secret garden” (you know, the one I talked about in this post.) but I couldn’t take a good picture because the wind blew it all over the place.

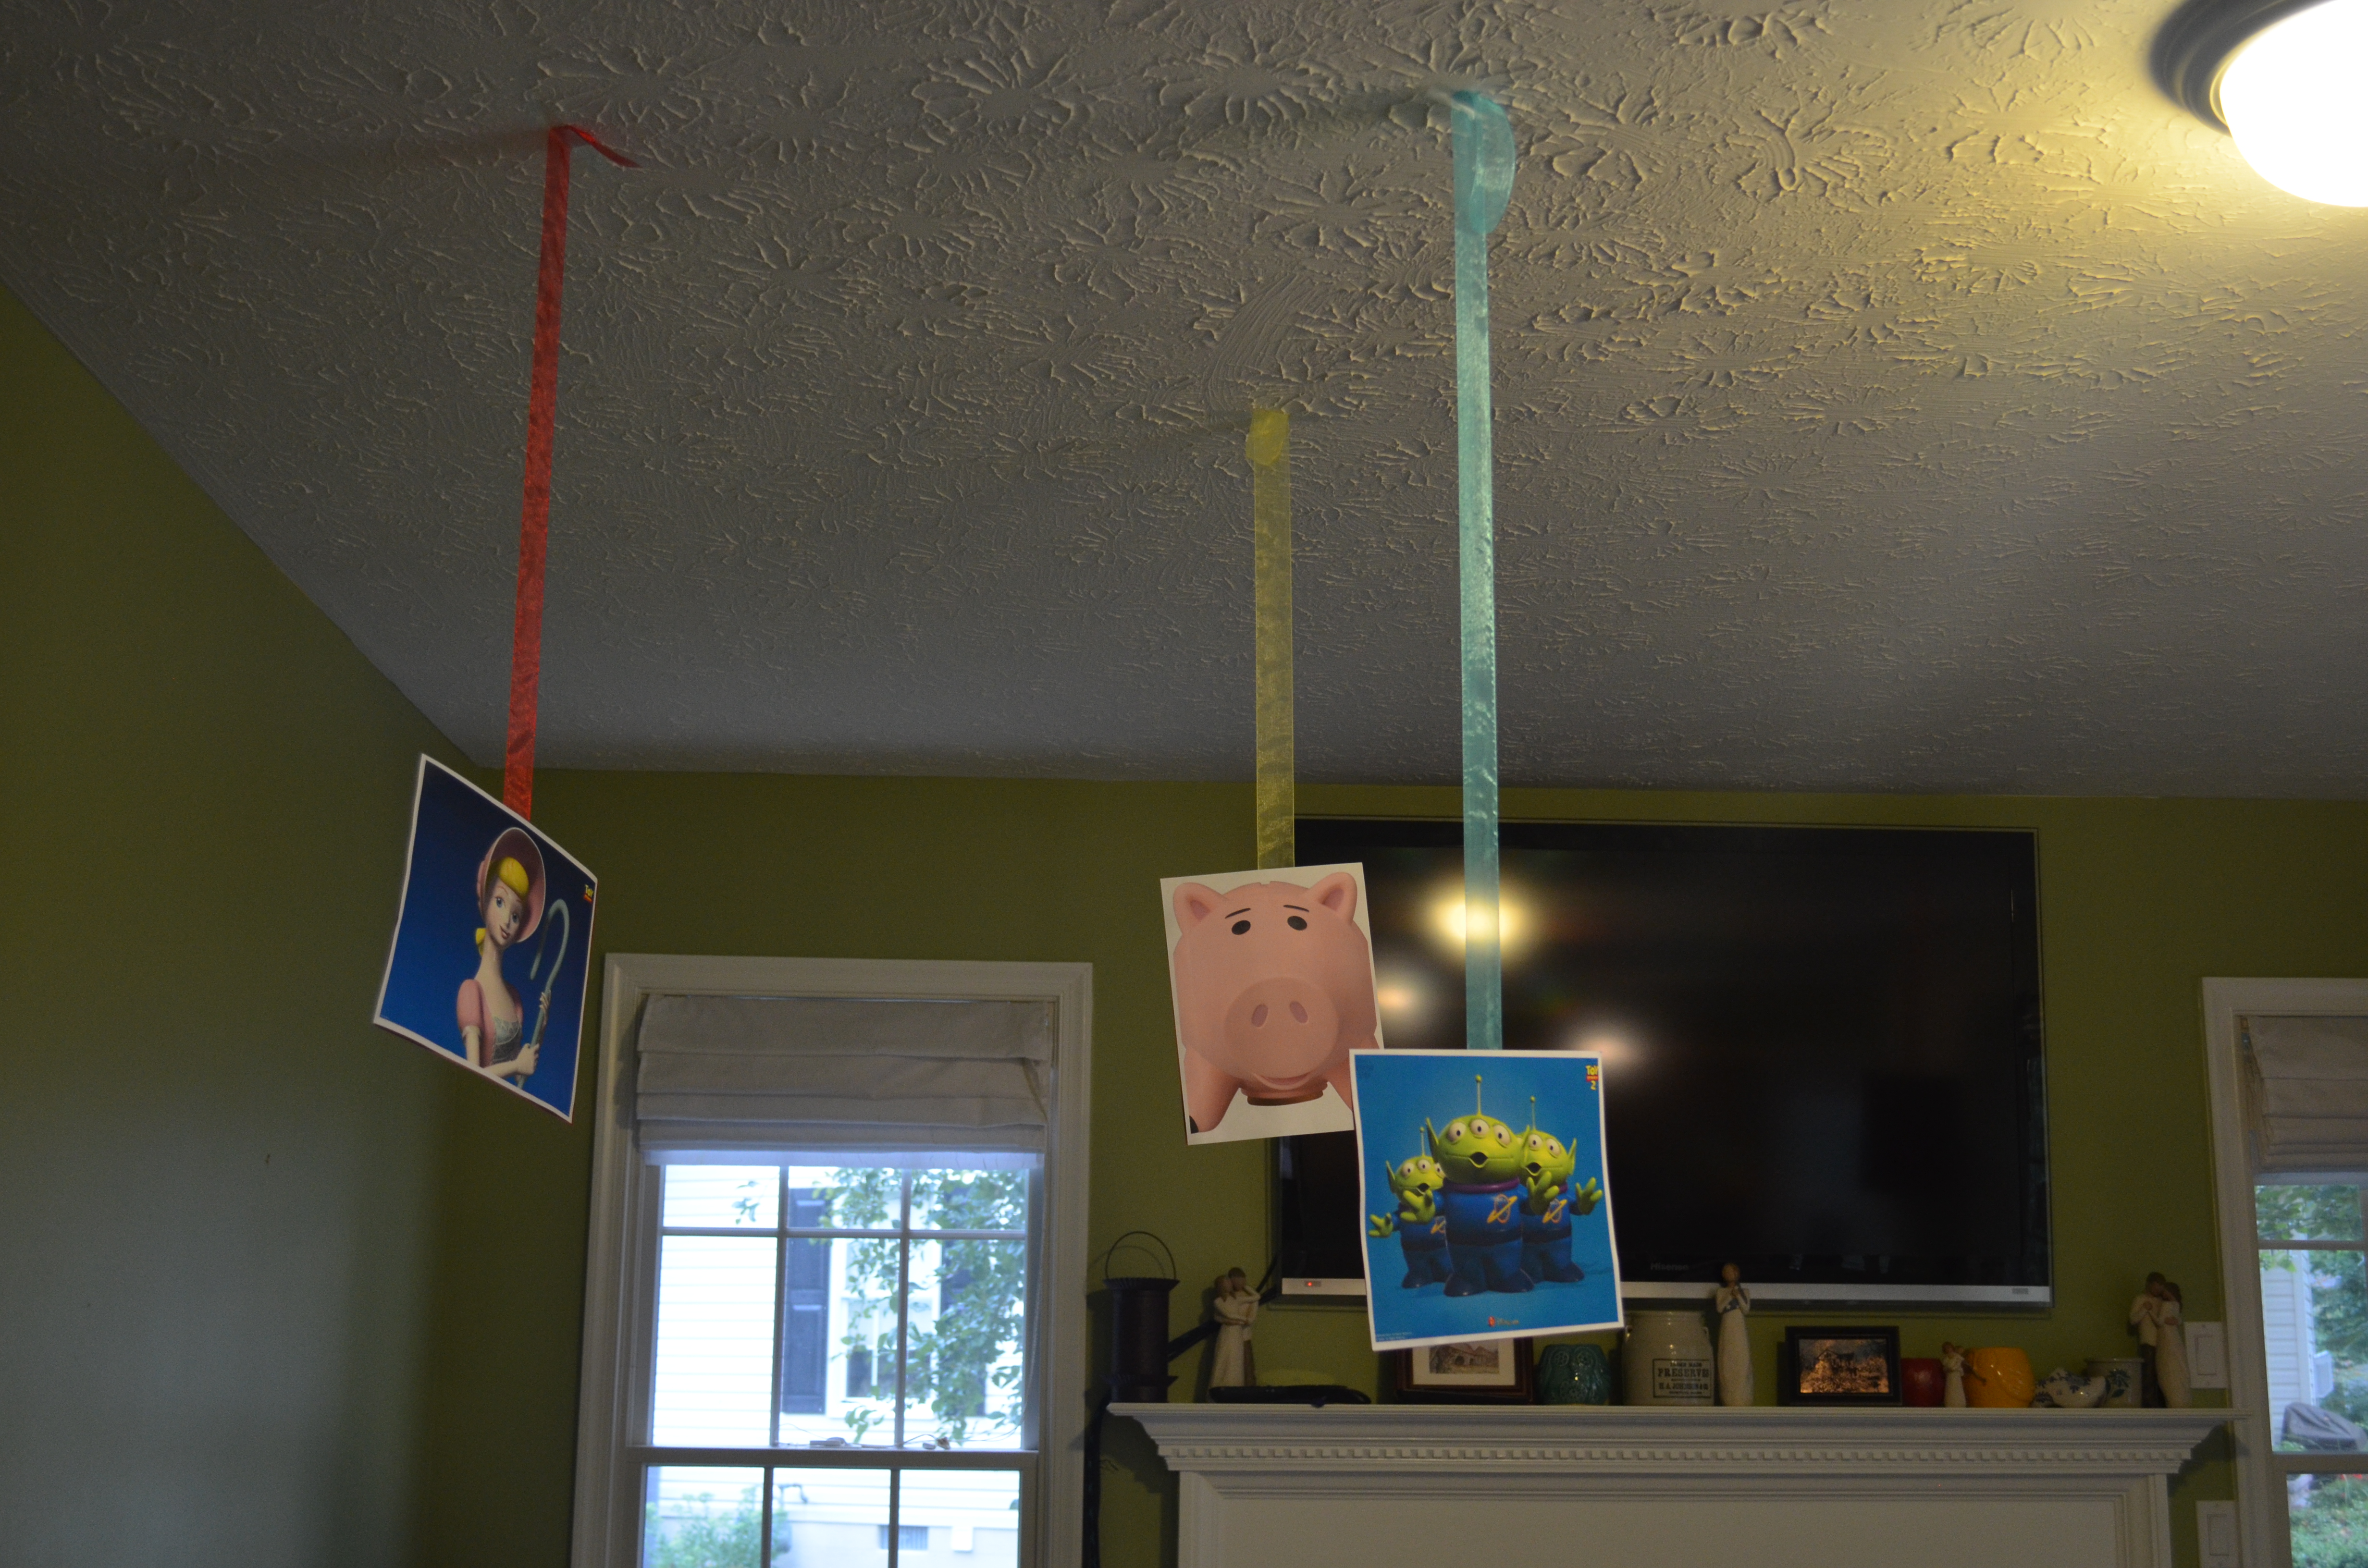
Our “secret garden” became Skylands (the place where skylanders live) for the day. We played all of our games there and I added some streamers in the different element colors just for fun.

DSC_0875 DSC_0868

The kids played three games…

DSC_0872

Smashing balloons that looked like chompies was a hit.

dsc_0920

We gave the potion to pop-fizz…

DSC_0916

AND defeated Kaos using the water element (water balloons)!!

DSC_0865

The signs used to announce each game were made using the picmonkey website, glued to a piece of card stock and taped to a Happy Birthday yard sign I found at the dollar store.

At the end of the games the kids were rewarded by paying a visit to the Skylands candy bar.

DSC_0879 DSC_0878

Each dish and the candy inside represented one of the elements. The tags for each dish were easy to make.

To make these you will need:

  • Print out of each element
  • Card stock
  • glue stick
  • ribbon

DSC_0829 DSC_0830

I made these the same way as the banner, just a little smaller. Cut the cardstock a little bit bigger than the print out, glue it on, punch a hole in each side, and put your ribbon through.

DSC_0886 DSC_0883

Looks festive, right?

The kids really liked the candy bar, but the best part was the birthday cake and Oreo truffles! I decorated the cake with my son’s favorite skylanders and made the sign. He loved that it said Tyler’s Adventure.  🙂

DSC_0894 DSC_0947

My sister made these delicious Oreo truffles and decorated them look like the fire element to go with the theme of the party. Don’t they look great?

I loved throwing this party together, and the best part was seeing the birthday boy’s face light up when he saw the skylander world come to life. He had a great time. Happy Birthday buddy!

DSC_0861 DSC_0890 DSC_0892

Gardens, Gardens, Everywhere!

I’m excited to share that the gardens at Johnson Manor are growing and looking good! The pictures in this post are from Mother’s Day weekend when it was beautiful, sunny, and a great time for a stroll through the gardens.

Since my last post, we added another box and filled it with all kinds of yummy vegetables such as broccoli, watermelon, eggplant, and cucumbers.

DSC_1087

We didn’t add as much fertilizer to the second box, it’s kind of an experiment to see which garden grows the better vegetables. Actually, the whole box garden adventure is an experiment to test out which veggies do well and which ones don’t.

DSC_1082 DSC_1081

Either way, they look beautiful, don’t you think?

The other part of my yard that brings me happiness and tranquility is my “secret garden”. It’s at the very front of our yard and isn’t actually a secret at all. My oldest gave it that name when we moved here and it’s stuck around. He’s cute like that.

DSC_1085

I love the curve in the brick that makes a neat little path between the two flower beds.

DSC_1086

It has a lot of greenery that grows, and we are working on adding some colorful flowers and bushes. The flower bed on the left was covered in ivy last year; we pulled it all out and added a hydrangea instead. I’m crossing my fingers it likes where we put it.

My favorite thing that grows here is this beautiful flowering bush. It has great color, but only blooms for about a month (maybe less). I wish it would stay colorful a little longer.

DSC_1083 DSC_1084

Walking through all of my gardens truly makes me happy. It reminds me of my grandparents and all the hours spent during the summer helping them tend to their garden. I miss them very much and this makes me feel a little bit closer to their memory. It’s not just a hobby for me, it’s a need. I have to be outside doing something in my garden.

P.S. Here is a shot of our delicious squash! Mmmmm….vegetables….

DSC_1079 DSC_1078

A Box of Dirt = My Sanctuary

It’s taken me a year or so, but I’ve finally found a spot around the outside of Johnson Manor (that’s the fancy name I’ve given my house) that I call my sanctuary, and my favorite spot to be in while the kids are playing outside. This magical little place just so happens to be the spot where my husband and I decided to grow our little garden.

Shortly after my last post my youngest son and I went to Lowes to figure out what we should grow this year. Here’s what we came up with:
wpid-20150411_122932.jpg

In the line up are a couple tomatoes, three types of bell peppers, Romaine lettuce, and cucumbers.

wpid-20150411_130745.jpg

Planting our veggies was fun! Some of the neighborhood kids came over to help and my boys dug a few holes. Though it seemed they were mostly interested in finding worms to put in the garden. Which then became a free for all to see how many creepy crawlies they could find and throw in the boy’s bug box.

wpid-20150411_125205.jpg

Picking out which vegetables to plant wasn’t hard, I went for the things that we would eat the most. This year is kind of an experiment to see what will grow and what won’t. I’m even more excited to stare through the window at my garden now that it has something in it. I’m crossing my fingers we get at least one veggie from each plant!

wpid-20150419_182713.jpg

This place is my sanctuary because I think it’s the most beautiful and peaceful spot in our yard. Our vegetable garden sits next to our flower beds that my oldest son has dubbed “The Secret Garden”. I will be posting about that later this year once all the flowers bloom. As the summer goes along I want to add other things like a bench and maybe some flowers to really make it feel inviting and comfortable.

Oh! And we also have strawberries popping up in our front flower beds!

Happy Gardening Everyone!

wpid-20150423_172717.jpgwpid-20150423_172711.jpg

Can We Talk Gardens?

Last summer was the first one we spent in our new house. We’ve been here now for about 1 1/2 years and I love it! The neighbors are awesome, it’s safe, and I truly feel at home here. All winter I’ve been thinking about what to do with the outside of our house. Last summer we planted flowers and bushes to spruce up the front, but the back and side yards were looking a little plain. I wanted to start a garden, so I added a few pots to the back of my deck and grew green peppers and lots of herbs. I was proud of my first little garden. This year I wanted to be a little more daring and try something a bit bigger.

A few weeks ago, my dream came true when my husband and one of his awesome co-workers built a new addition for our lovely estate. I’m talking about this fine specimen of a raised garden bed!

wpid-20150330_185924.jpg

I lovingly refer to it as the garden outside my window. I get to stare at it all summer and watch the plants grow; and bang on the window when a squirrel, rabbit, or kid gets to close.

We were finally able to get dirt in the thing over Easter weekend, along with some extremely fresh cow poop compost (I scooped it up myself!) to give those veggies a little nutrient kick once they get in there. Ahhh…the perks of having an aunt and uncle who own a farm.

20150406_180144

wpid-20150406_171106.jpg

Next up, the veggies! What to plant….I’m thinking tomatoes are a must and maybe one more veggie just to keep it simple. I’ll keep posting as our little garden grows. I would love to hear advice/ ideas from you on how to make this project even more awesome!